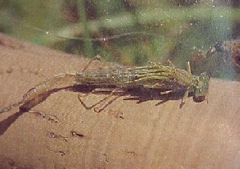
I reckon that the Woolly Bugger is the quintessential streamer or stripping fly. Fly fisher folk must agree with this statement because the Woolly Bugger seems to be the origin of more variations than any other, or at least almost any other, streamer or stripping fly. This fly is a variation on the standard Woolly Bugger theme. It’s thinner than standard woolly buggers and the palmered hackle has been replaced with a fuzzeled thorax and body and just a front hackle. Because of its size it works well both on the point and bob.
The bead head version with either black, chartreuse, orange copper or gold bead heads is also a great fly for deeper water.
Materials
| Hook |
Thread |
Tail |
Rib |
Weight |
Body & thorax |
Wing |
| Size 8 to 16 long shank (Tiemco 3761) |
Olive |
Marabou |
Fine copper wire |
Lead wire if required |
6xxx |
Olive hackle |
Process
| A |
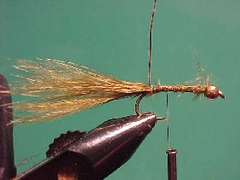
- If your going to add a bead head do it first and then for the rest of the instructions treat “behind the eye of the hook” as “behind the bead head”. Most beads have a large opening at one end and a smaller opening at the other. Slide a bead over the point of the hook small opening first and position it behind the eye of the hook.
- Wind the thread in touching turns to the bend of the hook.
[member Link=”p=10018″ Title=”Understanding hooks”]
- If your going to add extra weight do that now. I only add three wraps of 0.10 mm lead wire just to make sure they have negative buoyancy.
[member Link=”p=2372″ Title=”Adding weight to a fly”]
- Tie in a tail 1.5 times as long as the hook. Resist the temptation to make the tail too bulky or too short. For a damsel this is not really a tails it’s more of a trailing shuck or a trigger point.
[member Link=”p=1987″ Title=”Lighter than a woolly bugger tail”]
- Tie in a length of copper wire.
|
 |
| B |
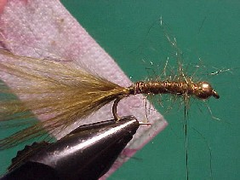
- Dub on a cigar shaped body almost up to the bead. I like to use a mix of 90% seals fur and 10% UV peacock dubbing.
[member Link=”p=2683″ Title=”Single strand dubbing”]
- Wind the wire ribbing along the dubbed body of the fly forming 7 or 8 segments.
[member Link=”p=2656″ Title=”Body segments on flies”]
- Tie the copper wire off behind the bead and worry off the excess wire.
- Take a piece of Velcro and tease out some of the dubbing from the body to represent legs.
|
 |
| C |
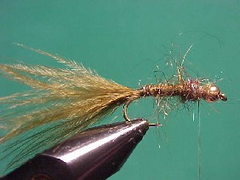
- Take a little extra dubbing which is just a few shades darker, or red if you want to add an extra trigger point,than the body dubbing and dub on a thorax on the front 1/4 of the hook shank.
|
 |
| D |
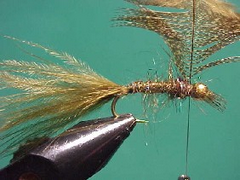
- Tie a hackle in by the tip. Selection of the hackle is often made difficult by what is available. I have used an olive guinea foul hackle here but you may need to settle for a hen hackle, a partridge hackle etc.
[member Link=”p=13108″ Title=”Woolly bugger hackles”]
|
 |
| E |
- Take just two or three full turns of the hackle directly behind the bead head and secure it in place with a few wraps of thread.
[member Link=”p=3037″ Title=”Wet fly hackles”]
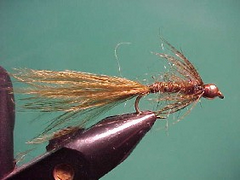
- Stroke the hackle tips back along the fly and then finish securing the hackle in that position with additional wraps of thread.
- Whip finish behind the bead head, trim the thread and varnish the thread behind the bead and the bead itself. If you don’t varnish the bead it will tarnish quite quickly.
|
 |

